
Rated: 4.9 / 5 based on 2100+ reviews. Read our reviews

Deal Of The Day! $50 Off Any Plumbing Service Get a free quote

How Long Do Boilers Last?

Do you want to get the most out of your HVAC system? Let Quality Heating, Cooling & Plumbing service your heating and cooling system for year-round comfort. Call today to request service! 

When colder temperatures settle in, your home’s heating system needs to function at its best to keep you comfortable. If you use a boiler as your primary source of heat, you’ll enjoy years of use before the system starts to wear. But exactly how long do boilers last?

This informative guide explains everything you need to know about your boiler, including how long it will last on average, what you can do to extend a boiler’s lifespan, and how to tell when you need a replacement. The experts at Quality Heating, Cooling & Plumbing, the most trusted HVAC contractor in Tulsa, reveal key facts about boiler maintenance and care below. 

How Boilers Compare to Other Heating Systems

Every household needs to stay warm throughout the chilly winter months, but they may use various heating systems to do so. Furnaces can produce heat by using natural gas, oil, or electricity as a fuel source. These systems tend to last 15 to 20 years on average but require regular maintenance and care to avoid common problems. 

Heat pumps make a great gas-free alternative to furnaces. These eco-friendly options don’t produce any heat through combustion but instead transfer existing heat from a natural source, such as geothermal heat. Heat pumps also serve as a dual heating and cooling system, so you don’t have to worry about having two separate HVAC systems. 

Many homeowners prefer boilers as their primary source of heat because they tend to last longer than other systems. These whole-house heating systems are also highly efficient. Modern electric-powered boilers have an annual fuel utilization efficiency between 95% and 100%.

How Long Do Boilers Last?

It’s a slight myth that boilers can last up to 50 years or more. This impressive lifespan was the norm for bulky cast iron boilers used decades ago. Today, they aren’t a reliable option because of their size and cost to operate or install. Modern boilers don’t last as long as cast iron boilers, but they do have a fairly impressive lifespan with proper care. 

How long do boilers last on average? Many homeowners can expect to get at least 20 years of use out of a boiler. However, some systems may only last about 15 years, while others can approach close to 30 years of use. It all depends on a few important factors. 

Boiler Lifespan Factors: Common Issues That Impact Boiler Longevity

Some homeowners can operate their boiler for 25 to 30 years, while others need to replace theirs after 15 years of use. What causes this large discrepancy in the lifespan? Below, we break down some common reasons why some boilers tend to wear more quickly. Using this information, you can adjust your system to reap the most benefits from it. 

Heat Settings and Overall Use

Do you set your thermostat higher than most people during the winter? Is your boiler always running to maintain such a high indoor temperature? If so, you’re more likely to experience issues with your boiler down the road. 

More use means the system will face more wear and tear. You can try lowering your heat settings to reduce the wear on your system or take measures to promote warmth throughout the house, including:

  • Using a fireplace or space heater
  • Insulating the house
  • Monitoring hot water use for both your shower and washing machine

Corrosion and Boiler Durability

Any sign of corrosion on your boiler can potentially decrease its lifespan. As the material continues to corrode over time, the system will begin to break down and eventually need replacement. It’s possible to add chemicals to the water supply to prevent corrosion. 

Regular Maintenance

If you’re surprised to learn that boilers can last up to 30 years, but you always need to replace yours every 15 years, it means you’re likely neglecting proper maintenance. Many people who ask HVAC experts, “How long do boilers last?” expect the system to last for decades without issue. However, boilers will need regular maintenance if you want to get the most use out of them. 

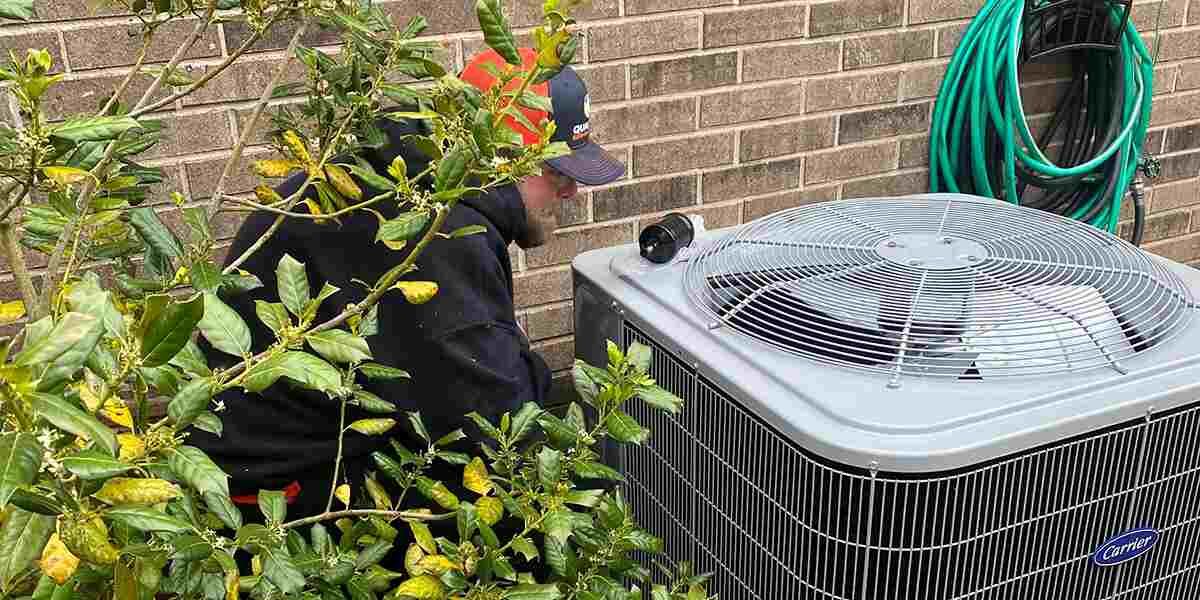
Schedule annual maintenance with an HVAC technician to ensure your boiler lasts a long time. The technician will clean parts of the system, tighten any loose connections, and lubricate moving parts to prevent friction. 

What To Expect During Boiler Replacement

When it comes time to replace your worn-out system, make sure you enlist the help of knowledgeable HVAC technicians with plenty of experience installing boilers. They can equip your home with a brand-new boiler with an impressive efficiency rating so you can save on your heating costs. The installation time may take a few hours, or it could span a few days, depending on the scope of the project. 

The process typically involves the following:

  • Removing the old boiler
  • Upgrading outdated pipes
  • Fitting the new boiler and its accessories
  • Testing the system to make sure it works properly

Your installer will walk you through the entire process and make sure you end up with a boiler that will meet your heating demands and budget. Remember to perform maintenance on your new boiler so you can prevent major repairs and issues that force you to replace it earlier than expected. 

Contact Quality Heating, Cooling & Plumbing for Superior Boiler Services

After reading this post, you no longer have to ask, “How long do boilers last?” If your boiler starts to fail or you want to prolong its life, we’re the team you can count on. At Quality Heating, Cooling & Plumbing, we specialize in repairing, replacing, and maintaining heating systems of all kinds, including boilers. Our technicians can make sure your home has a reliable heating system, whether you are installing a new furnace, seeking boiler repairs, or looking to switch to a heat pump. Contact us today at 918-262-5245 to schedule service. 

What Does a Furnace Limit Switch Do?

Keep your furnace working when you need it most. Contact Quality Heating, Cooling & Plumbing to schedule furnace repair or maintenance services.

You’re probably aware of the basic process your furnace uses to produce heat throughout your home. However, many homeowners have limited knowledge about certain components within the furnace, such as the limit switch. If you’ve ever wondered, “What does a furnace limit switch do,” this guide will provide an in-depth answer.

Discover the crucial role this piece plays in keeping your furnace operation safe. Learn more about furnace limit switches thanks to the HVAC (heating, ventilation, and air conditioning) experts at Quality Heating, Cooling & Plumbing. Contact our specialists when you need a reliable heating and cooling company in Tulsa.

How Furnaces Heat Your Home

Do you know how a furnace fills your home with heat during the coldest months of the year? The process begins with a fuel source, such as natural gas, and burners to spark a flame and create heat. From there, the following takes place:

  • The flame burns in the combustion chamber to produce heat and fumes.
  • Hot air passes through a heat exchanger to remove gas fumes.
  • Heat then travels to the motor blower to distribute it throughout your vents.
  • The process repeats until your home reaches the temperature on your thermostat.

Many people think that the thermostat is the only temperature control element HVAC systems use. However, a furnace limit switch proves equally important.

What Does a Furnace Limit Switch Do?

The limit switch is essential for overall furnace safety. Its main function includes controlling the temperature of the furnace and bringing it down if it gets too high. Without this component, your home could face the risk of a fire or severe furnace damage due to the system overheating.

It helps to understand a basic breakdown of a normal heat cycle and how the limit switch works:

  • You power on your furnace by turning up the temperature on your thermostat.
  • The furnace burners begin the process by heating air in the plenum, a chamber that holds heat before distributing it through your vents.
  • The furnace will continue to heat the plenum until it reaches your desired temperature and then transfer heat through your duct system.
  • The limit switch monitors the temperature and shuts down the burners if the furnace starts to overheat.
  • A blower fan activates to cool the system down to a safe temperature.
  • After the furnace is at a safe temperature again, the limit switch triggers the burners to repeat the process.

Without a functioning limit switch, a furnace can put you in harm’s way. A fire can break out due to overheating. This becomes especially dangerous when combined with pressurized gas flowing into the burners.

Overheating can also cause the heat exchanger to break. This exposes you to carbon monoxide gases, which can cause serious health effects.

Regular furnace maintenance keeps the limit switch working properly and ensures your safety every time you heat your home. Technicians will check all components of the system, including the limit switch, and perform repairs if something is wrong. This helps keep your heating system operating efficiently and can extend its lifespan.

Signs Your Furnace Limit Switch Is Starting To Fail

Along with “What does a furnace limit switch do,” one of the most common questions homeowners have about this component is, “How can you tell your limit switch is failing?” Look out for the following signs that it needs repairs:

  • The system suddenly stops before reaching your desired temperature, also known as short cycling.
  • The furnace blowers keep running.
  • Cool air comes out of your vents instead of heat.

While these issues may be frustrating, you can have peace of mind that the limit switch continues to keep you safe by preventing the furnace from getting too hot. However, you don’t want to spend the frigid winter months in a cold house because your limit switch activates too often or when it doesn’t need to cool the system down. Let a licensed technician inspect the furnace and perform repairs so you can enjoy reliable heating when you need it most.

Why Furnace Limit Switches Fail

Your limit switch may start malfunctioning on its own due to wear and tear over time. However, a few other causes may be responsible for the heating issues. Discover what else causes your limit switch to quit working as it should.

Dirty Sensors

The limit switch monitors the furnace’s temperature through a sensor. If grime covers the sensor, the switch can’t properly read the temperature and causes the system to short as a precaution.

Lack of Airflow

Limited airflow within your heating system can cause the switch to trip. Blocked vents and clogged air filters can restrict airflow, so it’s vital to make sure heat can travel throughout your home.

What To Do if Your Furnace Limit Switch Malfunctions

Although you now know the answer to “What does a furnace limit switch do,” you might be wondering what to do if this heating component fails. Take the best course of action and contact a professional HVAC contractor at the first sign of an issue. They can repair or replace the switch so that it functions properly.

They will also remind you of ways to keep your system in excellent condition, such as:

  • Changing your air filter every one to three months
  • Keeping vents open and clean
  • Scheduling regular maintenance

Contact Quality Heating, Cooling & Plumbing for Superior HVAC Services

After reading through this information, you no longer have to ask, “What does a furnace limit switch do?” Understanding this part of your heating system can help you keep your furnace operating safely. If you have other questions regarding your heating system, such as if running a furnace without a filter is safe, turn to the experts at Quality Heating, Cooling & Plumbing. 

We can assess your HVAC system, answer any questions you have, and get all components working properly thanks to our repair and maintenance services. To schedule a furnace inspection, contact our friendly specialists in Tulsa at 918-393-4577

How Long Does a Gas Furnace Last?

Is your gas furnace having problems? Call 918-393-4204 to receive expert service on your gas furnace from top-rated professionals with Quality Heating, Cooling & Plumbing.

Your furnace keeps you comfortable during cold months. However, after many years of using the same system, you may start to notice operational issues.

Many homeowners want to know, “How long does a gas furnace last?” Examining the factors that impact gas furnace lifespans can teach you how to optimize your system.

The best way to keep a furnace in top condition is to enlist a trusted heating contractor in Tulsa, OK, for routine maintenance and inspections. Quality Heating, Cooling & Plumbing offers top-rated services for every component of your HVAC system. Call today to optimize your indoor heating and cooling.

Average Lifespan of a Gas Furnace

Many homes use furnaces and boilers for heat, but many homeowners still don’t know the answer to the question, “How long does a gas furnace last?”

Most furnaces and boilers have a lifespan of about 15 to 20 years. Gas furnaces, however, sometimes have a slightly shorter lifespan.

In rare cases, you might get 30 years of effective use out of your gas furnace. Certain optimization strategies give you a better chance of receiving more than 15 years of effective operation from your furnace.

Factors that Impact Furnace Lifespan

Before learning how to optimize your furnace, it’s essential to understand the components that impact its lifespan.

Furnace Size

Many people don’t realize the importance of their furnace size. If a furnace is either too big or too small, it can lead to a premature decline.

Furnaces that are too small will have to overwork to heat the space. Not only will this increase energy use and utility expenses, but it can also lead to early failure.

Oversized furnaces might seem unproblematic because they have more power than necessary. However, this actually causes the furnace to turn on and off too frequently, and this inconsistent cycling can cause issues with certain power mechanisms.

Make and Model

The make and model of a system provides a baseline for its lifespan. Newer systems have energy-saving mechanisms that extend their lifespan and increase efficient operations.

Proper Installation

Your furnace’s vitality depends heavily upon the quality of installation. Considering that over half of all  furnace installations are improper, hiring qualified experts for the job is especially crucial. Installation issues can reduce efficiency, increase breakdowns, and significantly decrease system lifespan.

Humidity and Ventilation

Humidity can cause problems with almost any HVAC system. For gas furnaces, humidity leads to premature rusting and breakdowns. Additional moisture in the air can also prove problematic for the system’s heat exchanger.

Quality Ductwork

The ductwork running throughout your ceilings is responsible for more than just distributing air. In fact, ductwork significantly impacts your system’s efficiency.

Shoddy ductwork could allow air to seep into your attic spaces and drywall. While this doesn’t pose any threat to your property, it decreases the efficiency and increases the workload of your furnace. These issues can lead to a shorter lifespan.

Maintenance Routine

Getting quality maintenance from qualified professionals provides a top way of optimizing your gas furnace. Routine inspections and tune-ups can address developing issues before they turn into significant problems. You could also see savings over time after professional maintenance optimizes your system.

Ways to Maximize Your Furnace Lifespan

While certain predetermined factors impact your furnace’s lifespan, there are ways to maximize its longevity. Investing in these optimization solutions can save money on home heating in the long run.

Hire Top-Rated Experts for Installation

Installation errors create a sketchy foundation for operating success, so it’s imperative to hire only top-rated professionals to install your furnace and ductwork. Installation professionals should have licensing, insurance, many years of experience, and excellent customer reviews.

Choose an Updated Make and Model

HVAC technology changes constantly. Whether you’re replacing an old furnace or getting your first system, choosing an updated make and model ensures the longest possible lifespan. Research different brands and special features to find the best fit for your space.

Limit Humidity and Moisture Exposure

Limiting humidity within your interiors improves all your home comfort systems. Invest in a dehumidifier or program your air conditioner to run more frequently to eliminate moisture in the air. 

Limiting humidity mitigates potential issues for the gas tank, fuel lines, heat exchanger, and ductwork. Protecting these expensive parts of your system’s infrastructure helps maximize your gas furnace’s lifespan.

Schedule Regular Maintenance

Homeowners who hire professionals to perform regular maintenance and inspections on their systems can catch potential problems long before they flourish into expensive repair issues. Call experts from Quality Heating, Cooling & Plumbing for seasonal furnace maintenance to keep your system optimized and prepared for seasonal temperature extremes.

Use Your Furnace More Strategically

Timing your furnace usage more specifically and strategically allows you to get just the right amount of interior heating without overworking your system. Turn your furnace on lower temperatures whenever you leave the house and bundle up with extra blankets to limit nighttime use. These seemingly minor strategies can lead to savings and increased system efficiency.

Pay Attention to Filter Cleanliness

Air filters keep air flowing through your home clean and healthy. As dirt and grim accumulate on your filters, it causes problems for every part of your HVAC system. Gas furnaces can experience particularly costly issues with dirty filters.

Dirty filters restrict airflow. Restricted airflow can cause overheating and threaten the safety of the furnace’s mechanical components. Changing your filters monthly can help avoid these issues.

Signs Your Furnace Might Need Replacing

While there are ways to optimize your furnace’s lifespan, there are situations where you may need to decide if repairing or replacing your furnace is more appropriate. Systems older than 15 years might start experiencing frequent problems that lead to decreased efficiency and increased energy bills. As such, replacing your furnace could be the best way to save money long-term on your home’s heating needs.

The following are some signs that you should replace your furnace:

  • System is older than 15 years and experiences frequent problems
  • Repairs cost more than 50% of the cost of a new system
  • Strange noises or odors during operation
  • Inconsistent cycling
  • Drastically increasing energy bills
  • Fluctuating temperatures

Should I Replace My Furnace?

While asking, “How long does a gas furnace last?” it’s also important to consider when you might need to replace the system. By referring to the signs above, you can start to get a sense of when continuing to operate on the same furnace system might not be beneficial. 

Another way to decide whether you should replace your furnace is to consult with professionals from Quality Heating, Cooling & Plumbing. Our experts can inspect your current system and help you decide whether a repair or replacement job is the best next step.

Optimize Your Heating Capabilities with Service From Quality Heating, Cooling & Plumbing

When your furnace control board starts to age, it could cause problems that might make a complete replacement more worthwhile. However, these jobs require qualified professionals who can inspect and replace your system.

Top-rated experts from Quality Heating, Cooling & Plumbing offer Tulsa residents the best services for any heating, cooling, or plumbing issues and believe that everyone deserves the best plumbing services available. We offer financing options so you can choose a payment plan that works with your financial situation.

So, how long does a gas furnace last? For answers to this and more questions, call 918-393-4204 and consult professionals from Quality Heating, Cooling & Plumbing.

Putting Plants Around Your AC Unit: Do’s and Don’ts

Is your HVAC unit not performing at its best? Don’t hesitate to contact us at Quality Heating, Cooling & Plumbing to diagnose and address the problem!

When you put plants, flowers, and shrubbery around your house, you have to carefully consider which species you’ll use, their needs, and their placement. You must know where to put plants around AC units outdoors because the flowers can affect the performance of the HVAC system.

Quality Heating, Cooling & Plumbing offers expert AC installation in Tulsa, OK, as well as many other top-tier HVAC services. We understand the desire to use plants to improve your yard’s appearance, but some options can prove problematic for your air conditioner unit. Consider our guide below to learn the best practices for putting plants around an air conditioning system. 

Do: Provide Sufficient Clearance Around Your Air Conditioner

The main problem people experience with putting plants around AC units stems from their closeness. Air conditioners need sufficient airflow via the outdoor condenser unit to make sure the system’s interior components work correctly.

Airflow restriction, whether from the air handler indoors or the condenser unit outside, can cause many problems for the equipment over time. For example, a lack of proper airflow can keep cool air from quickly dissipating around the condenser coils, resulting in ice developing on the coils.

To ensure the right amount of air passes through the air conditioner’s condenser unit, you should put plants, flowers, and other greenery at least three to five feet away from the unit. This rule applies to each side of the unit, not just the front. This gives the system enough space and provides sufficient clearance for air conditioner technicians to access the condenser unit safely for inspections, maintenance, and repairs.

Airflow and accessibility aren’t the only reasons to ensure you don’t put your plants too close to the equipment. The air conditioner condenser unit typically expels lots of heat. However, the heat could damage some plants. 

Do: Consider How Plants Affect the Shade Around the Air Conditioner

One of the best things about landscaping with your air conditioner in mind is that shade can improve the system’s efficiency. Though the outdoor system can handle year-round weather and sun exposure, keeping it under abundant sunlight makes it harder for the equipment to dissipate the heat it generates. As a result, your home could have extra solar heat gain, which forces the air conditioner to work harder to keep the interior cool. 

With shade, you can stay comfortable indoors without overworking your air conditioning unit or paying extra for monthly utilities due to excessive energy consumption

Trees offer the best shade opportunities. Ideally, you should plant trees in your yard at least five feet away from the cooling system. Choose options that keep their leaves or needles throughout the winter, such as beech or evergreens, to minimize how much debris will shed into your condenser unit.

Do: Know What Plants Work Best Around Air Conditioners

Though your plant and landscape preferences will likely influence your yard’s appearance, it helps to know these universal tips about the best options for plants around AC units before making any drastic changes to the outdoor space:

  • Choose Plants That Grow Up Instead of Out. Even if you put plants three feet away from your air conditioner, it could still be a problem if the foliage grows outward. Instead, opt for plants that grow upward, like golden juniper.
  • Opt for Evergreens. Trees that shed their leaves and needles during their dormant period will leave your outdoor air conditioning equipment vulnerable to organic debris buildup. If you don’t want the extra landscaping and HVAC maintenance, choose evergreens like spruce or boxwood.
  • Avoid Plants That Attract Insects. Bees, wasps, and other insects often make nests in or around air conditioners due to the climate around them. Unfortunately, major pollinators like bee balm and goldenrod attract these insects, so putting them close to your system isn’t a good idea. 
  • Stay Away From Thorny Plants and Shrubs. Though rose plants and holly bushes are beautiful and desirable to many homeowners, we don’t recommend putting them too close to air conditioners. Their thorns can make it difficult to access the equipment for repairs and upkeep.
  • Consider Using Drought-Tolerant Plants in Your Landscape. Since air conditioners expel a lot of heat, consider adding drought-resistant plants near them to prevent avoidable damage to the flowers and shrubs. 

Do: Explore Other Landscaping Options for Your Yard

Many people consider the outdoor portion of their air conditioning units to be eyesores and always look for ways to cover them. Putting plants around it will sometimes work, but that’s not the only solution. Consider these other landscaping tips for hiding your air conditioner:

  • Potted Plants: Instead of going through the work of putting plants directly into the soil around the air conditioner, you could use large potted plants. Flower pots make it easier to adjust the landscape’s appearance and the plants’ distance from the condenser unit.
  • Fencing: A small fence or trellis around the equipment with decorative vines allows you to discreetly hide your air conditioner unit without negatively impacting your yard’s appearance. 
  • Gravel: Despite not hiding an air conditioner unit, creating a lovely gravel garden around the system will minimize debris and make your yard’s landscape look intentional and well-maintained with minimal upkeep. 

Don’t: Put Flower Pots or Other Items on the Condenser Unit

A common misconception people have about air conditioners and their outdoor units is that clearance only applies to their sides and not their tops. It’s important not to put flower pots or other items onto the condenser unit.

Not only could the vibrations from the equipment possibly topple the potted plant and fill the unit with soil, leaves, and other debris. The pot could also restrict airflow if it’s big enough. 

Don’t: Cover Your Air Conditioner Too Much

You could buy an air conditioner screen that shields it from sight and prevents debris from getting inside of it. Still, you don’t want to restrict airflow, which sometimes occurs with these screens, so it’s best not to use them. If you want something to hide the equipment from view, install a garden hedge or lattice at the appropriate distance from the air conditioner.

Don’t: Forget About Grass and Other Low-Lying Plants

Grass and low-lying plants around AC units can also become problematic if they grow too high or if you mow too closely to the equipment. If grass blades, mud, pebbles, and other materials get inside the equipment, it could dirty the condenser coil and reduce its efficiency.

Ideally, grass and perennials should be two to three feet away to minimize complications. If you want to improve the landscape directly around the condenser unit, a stone border or gravel garden is the way to go. 

Reach Out to Quality Heating, Cooling & Plumbing Today for Air Conditioning Help

Knowing how to correctly put plants around AC units and knowing why AC placement matters will help extend the life of your system and ensure its efficiency. Still, you can count on our experienced professionals at Quality Heating, Cooling & Plumbing to provide the care and attention your cooling system needs. We offer reliable and affordable HVAC repair, installation, and replacement services throughout Tulsa, OK.

We’re the team to call if your condenser unit has a problem due to nearby plants, insects, or other causes. Call 918-262-5245 to request an appointment with us at Quality Heating, Cooling & Plumbing today.  

Why Is My Air Conditioner Blowing Mist?

During the hottest months of the year, there’s nothing better than walking into an air-conditioned room to escape the outdoor heat. As a result, issues with your AC during these months could threaten your comfort. For example, when heat and humidity increase, you might start to notice mist coming from your air conditioner. 

You may worry, “Why is my air conditioner blowing mist?” Discovering the reasons why mist forms and how to reduce an AC moisture problem can give you peace of mind.

If you’re dealing with HVAC moisture issues, call Tulsa’s expert AC repair from Quality Heating, Cooling & Plumbing. Our licensed and insured HVAC professionals can keep your home cool, dry, and comfortable year-round. Call today to schedule a service consultation.

How Air Conditioner Mist Forms

During air cooling cycles, your HVAC unit cycles air throughout your property, removing heat and humidity in the process. When cooler air interacts with warmer, humid air, it’s not uncommon for mist to form. However, it’s only condensed water vapor resulting from the interaction of the cooler and less cool air.

The amount of mist formed depends on the dew point of the room. The dew point is the temperature at which water condensation and mist can form.

On particularly hot days when your indoor spaces could become more humid, it would not be uncommon to see a good amount of mist as your air conditioner powers on. While this mist is not usually indicative of an issue, it might be wise to get your system checked.

Smoke vs. Mist From Air Conditioning

While asking the question, “Why is my air conditioner blowing mist?” it’s essential to consider the difference between mist and smoke. If smoke comes from your AC unit, call professionals immediately, as you could be dealing with a dangerous issue.

Odor provides the first indicator of whether you’re dealing with a mist or a smoke problem. Mist coming from your AC unit shouldn’t have any smell whatsoever. When smoke is blowing from your air vents, you’ll know immediately by the charred, burning smell.

Although mist should have no smell, a musty scent could indicate a mold problem. In these cases, call professionals to inspect your unit. Otherwise, mist formation probably does not indicate an AC cooling problem requiring attention.

Reasons for an AC Mist Issue

There are many reasons an AC mist issue might occur. However, these reasons typically all relate to seasonal weather changes that create the environment for more mist to form as air conditioners power up.

Temperature Changes

As the temperature increases during the summer months, it’s not uncommon for there to be more moisture in the air. Additionally, hotter days and temperatures mean that cold air will interact with warmer air more significantly. Mist could increase during these periods as the heat makes it easier to form.

Humidity Levels Increase

Increasing indoor humidity levels are another main culprit for mist coming from an AC unit. When there is more moisture in the air, there is a higher chance of mist forming. Pay attention to your indoor humidity levels, knowing that there is no cause for concern when humid days yield greater mist.

Excess Water Buildup

Like increased humidity, water buildup within your air conditioner will invariably cause more mist formation upon operation. Condensation in AC units can occur from many different sources, some problematic and others not. However, if you notice any frost or leaks, you might need to get your system checked for water buildup.

Ways To Stop Mist Formation

While mist is typically a nonissue for air conditioners, it’s essential to know how to stop mist formation. These are the six main ways of decreasing mist formation.

Variable Speed Air Conditioner

Variable speed air conditioners automatically vary fan speeds to optimize indoor cooling, limit mist, and reduce energy costs. Variable speed units can increase and decrease fan speeds to achieve ideal temperatures more quickly and give the unit breaks that limit energy use. Investing in one of these units could offer more benefits than just limiting mist.

Replace Air Filters

Dirty air filters offer another explanation for excess mist formation. As air cycles through your system to cool your home, it brings with it dust and grime from the air filters. Excessively dirty air filters can seemingly create more mist, as cooler air contains more dust particles.

Keep AC Powered on While Out

Most people think they’ll save money by turning off their air conditioner every time they leave home. However, keeping your air conditioner powered on while you’re gone can provide both energy savings and mist reduction. Because your home won’t have time to heat up, keeping your unit on could resolve mist. 

Get a Dehumidifier

Removing humidity from the air will immediately limit mist. Investing in a dehumidifier can make your home more comfortable and dry while limiting mist.

Ensure You Have a Properly Sized Unit

Any residential or commercial space that has an improperly sized air conditioner will experience issues. Among these problems, mist formation might be at the top of the list. Thus, excessive mist might indicate that your air conditioner is not the proper size for your space.

Call Professionals for an Inspection

If mist formation is causing concern, call professionals for an inspection. HVAC experts from Quality Heating, Cooling & Plumbing can check your entire system to see if there are problems that require professional attention.

Fortify Your AC Unit With Top-Rated Professionals From Quality Heating, Cooling & Plumbing

Have you noticed that your house is colder than the thermostat setting? Mist offers one sign of temperature regulation issues and moisture problems for your HVAC unit that may require professional attention.

When you’re ready to address your AC cooling problem or moisture issue, call HVAC experts from Quality Heating, Cooling & Plumbing. With over 20 years of experience, we’re the best local professionals to optimize your HVAC system. 

So why is my air conditioner blowing mist? Learn more about your AC moisture problem by calling 918-276-7151 and consulting top-rated HVAC professionals from Quality Heating, Cooling & Plumbing.

The Ultimate Guide to the 7 Common HVAC Systems

HVAC systems serve as one of the most essential features of any home, office, or commercial space. However, when choosing a system, many prospective buyers don’t realize how many options are available.

Without the right information, choosing between common HVAC systems could be stressful. With these decisions, it’s most important to prioritize your space’s needs and consider how you want to use your system. Our guide to the seven common HVAC systems can help you decide what is best for you.

Call the top-rated heating and cooling company in Tulsa when you’re ready to install your new HVAC system. Whether you need help choosing between different types of air conditioners or require maintenance on your current system, call Quality Heating, Cooling & Plumbing.

Ducted vs. Ductless Systems

Before diving into the different types of heating and cooling systems, it’s important to understand the difference between ducted and ductless systems. Simply put, a ducted system distributes air throughout a space with vents and ductwork integrated into the framework of the property. These systems typically require installation during a building’s construction.

Ductless HVAC systems come in many different forms. However, the main feature is that these units typically serve only one or a couple of spaces. Ductless HVAC systems usually fit spaces that require more temperature control flexibility.

#1: Split System

Split systems are one of the most common HVAC varieties. These ducted systems have split components for heating and cooling, which users can control with one centralized thermostat. 

In most cases, the cooling component depends on an outdoor condenser unit while the heating comes from a furnace or gas heater hidden in a basement or closet space. These HVAC system types allow for high levels of heating and cooling control to keep temperatures consistent throughout the building.

Some of the pros include:

  • Centralized system
  • High-level heating and cooling control
  • Keeps temperatures consistent
  • Controlled on one thermostat

Some cons include:

  • Higher maintenance needs
  • More expensive to install
  • Provides less flexibility

#2: Hybrid Split System

Another one of the most common HVAC systems is the hybrid split system. Like split systems, hybrid split systems have different heating and cooling components that distribute air through ductwork and vents. 

The main difference between these HVAC system types is the heating source. While hybrid split systems may still utilize gas for heat, they also have backup electric options to sustain heating and reduce energy costs.

Some pros include:

  • Centralized temperature control
  • Distributed through ductwork
  • Offers gas and electric heating

Some cons include:

  • Higher upfront costs
  • Increased maintenance needs
  • Less temperature control flexibility

#3: Packaged Systems

Packaged heating and cooling systems provide a more compact and less expensive way of delivering temperature control to your space. These systems house the heating and cooling components in the same unit, connecting them to a building’s supply and return ducts. Offering lower costs, maintenance, and space needs, a packaged system might be the perfect fit for your small space.

This system has several pros, including:

  • Lower upfront costs
  • Lower maintenance needs
  • Centrally sourced heating and air

But there are a few drawbacks:

  • Somewhat less powerful than split systems
  • Not suitable for large spaces

#4: Zoned HVAC Systems

Zoned HVAC systems provide the highest degree of temperature control among the ducted configurations. These common HVAC systems function like split systems but allow users to vary the temperature in different zones.

People who choose these systems can also decide how they want to zone the HVAC unit. Zoning flexibility allows users to group together certain rooms, maintain different comfort levels, and save energy.

These systems offer:

  • Centrally sourced heating and cooling
  • Increased temperature flexibility
  • Energy savings
  • Zoning flexibility

But they also have:

  • Higher upfront costs
  • Higher maintenance needs

#5: Portable Spot Coolers and Heaters

Among the ductless HVAC system options, portable spot coolers and heaters offer the most flexibility and cheapest operation. Portable spot coolers and heaters are units that users can move throughout their space at different times to provide heating or cooling to one area.

Most spot coolers and heaters operate from electrical power and have wheels so they can move around any space. Regardless of this flexibility, the system still requires a safe output area for the exhaust created during heating and cooling production.

These systems have:

  • Portable heating and cooling
  • Lower costs
  • Lower energy use

However, they have some cons:

  • Only cools or heats one space at a time
  • Requires exhaust area

#6: Window AC Units

These air conditioners typically screw into the framework of a window and cool indoor air in one space. Cheap and simple to install, window AC units are ideal for smaller apartments and single offices.

These units are:

  • Flexible
  • Easy to install
  • Cost-effective

However, they have some drawbacks:

  • Cools one space
  • Less powerful unit
  • Provides only cooling

#7: Duct-Free Mini-Split

Duct-free mini-split systems also eliminate ductwork while providing excellent temperature control within a space. You might have seen duct-free mini-split air conditioners if you have ever encountered a wall unit.

These systems cool individual rooms, providing high temperature control flexibility. Furthermore, duct-free mini-splits reduce energy costs over time and provide significant savings.

These systems offer:

  • Flexible cooling
  • Energy savings over time
  • Excellent cooling for individual spaces

But they also:

  • Are less far-reaching
  • Have expensive installation
  • Still require some outdoor components

Choosing the Right System for Your Space

Even after understanding the HVAC systems available, you might struggle to select the best unit. Consult professionals from Quality Heating, Cooling & Plumbing for help choosing between the common HVAC systems. Our professionals can inspect your space and identify the best option.

Receive Expert HVAC Advice and Service From Quality Heating, Cooling & Plumbing

Experts from Quality Heating, Cooling & Plumbing can balance your HVAC system and optimize your indoor comfort. At Quality Heating, Cooling & Plumbing, we believe that everyone deserves excellent HVAC services to keep their space comfortable. Explore our financing options to get the service you need with a payment plan that aligns with your financial situation.

For more information about which of the common HVAC systems is right for your space, call (918) 276-7151 and consult professionals from Quality Heating, Cooling & Plumbing.

How Long Does It Take To Install a New Boiler?

Quality Heating, Cooling & Plumbing can help you install an efficient heating system when you call 918.393.4204.

If you’re looking for efficient heating methods for your home, you might wonder, “How long does it take to install a new boiler?” Keep reading to discover which factors affect how quickly Quality Heating, Cooling & Plumbing can install your new boiler. As a trusted and expert heating contractor in Tulsa, OK, we approach every job, no matter the size, with dedication and professionalism.

Benefits of Installing a Boiler

If you’re debating between boiler installation and some other type of heating system, knowing the benefits can help you more easily make the decision. 

Increased Efficiency

While different boilers have various efficiency ratings, a boiler is almost always more cost-effective than a furnace.

What makes a boiler so energy efficient? Whereas furnaces heat air directly, boilers heat water, which they then transport to radiators throughout the home where the steam ambiently heats the room. Because it takes less energy to heat water than air, they lower your utility bills.

Even Heating

While still relatively consistent, a home that uses a furnace for heat experiences less distribution than boiler-based HVAC systems. With a furnace providing heat, it quickly rises to the ceiling and then lowers as it cools. Especially in homes with high ceilings, this leaves you with inadequate access to the best-heated air.

A boiler uses radiant heat that keeps a consistent supply of warm air toward the bottom of your rooms. While many people find the heating from a furnace adequate, if your home can support a boiler system, you might find the difference in hot air consistency surprising.

Fewer Space Requirements

While some boilers take up more space than a furnace, a more modern variety called a combination boiler eliminates the water storage tank and heats water on demand. Much like a tankless water heater, these boilers are a great option for basements or utility spaces with unique layouts or space restrictions.

Better Air Quality

Furnaces require ductwork to distribute the air throughout your home and also use air filters to purify the air. Over time, the ductwork accumulates dust, which requires regular cleaning. You’ll also spend money on a new air filter for your furnace every 30 days. Over time, this affects your air quality and can aggravate your allergies or respiratory issues.

A boiler doesn’t use ductwork to distribute the warm air, as the steam travels through tubes and into your radiators or directly into your flooring. This means not only do you save money on cleaning and air filters, but you’ll breathe cleaner air that’s free of pollutants. A boiler also doesn’t dry out the air like a forced-air furnace.

Factors Affecting Installation Time

If you’re convinced about the benefits of a boiler, you’re probably wondering, “How long does it take to install a new boiler?” Whether you’re installing a new boiler or opting for a boiler replacement, several factors determine how long the process takes.

Type of Boiler

If you already have a boiler and are replacing it with the same type, installation should only take between four to six hours. You likely have one of the following boiler types:

  • Heat only: A heat-only boiler is the standard type and works with a hot water cylinder to distribute the heated water directly to your radiators. They work best in old homes with classic radiators that can’t stand up to the high pressure of a combination boiler. They’re fast and affordable to install, but the warranty doesn’t cover the extended pieces of the system like radiators.
  • System: These boilers are modern versions of conventional boilers, and while they still use a hot water tank, other components integrate into the boiler to take up a little less space. The major difference is that they don’t use open venting like the conventional boiler and can provide hot water in addition to heat. They’re excellent for homes or businesses that use a high volume of hot water, and the manufacturer’s warranty often covers a greater percentage of the system.
  • Combination: A combination boiler provides both heat and hot water without requiring a separate tank. It provides instantaneous hot water by heating it directly from the main cold water line. While they’re more expensive to install, they use significantly less space, have lower maintenance costs, and you don’t have to wait for your water to heat up.

In addition, your boiler could use electricity, natural gas, and other types of fuel. If you change the type of boiler or its fuel source, it can take up to three days to install the boiler.

Current HVAC System

If your home currently uses a furnace and forced air for its heat, changing to a boiler-based system can take substantial time. Because it requires significantly reworking your HVAC system and installing new components, installing a brand new boiler can take even the best professionals up to five days.

Water Supply and Other Complications

Because your boiler requires access to your water supply, if complications occur during the installation, it can extend the job’s duration. The most common complications with the water supply and other components include the following:

  • Connection leaks, such as a pipe of the incorrect size
  • Defects in water transmission, which also arise from the wrong size pipe, and which can decrease the boiler’s efficiency
  • Gas leaks, which can pose a serious safety threat
  • High pressure within the boiler, which can cause an explosion

While these problems are rare, they require immediate attention from a specialist and often extend the installation time for a day or two.

How Does an HVAC Specialist Install a Boiler?

What is the installation process for a new boiler? The procedure usually looks similar to the following:

  1. We walk you through the process so you know what to expect. If we think the installation will take multiple days, we encourage you to go about your life as normal.
  2. If you have a boiler already, we cut it out and clean the existing system. Sometimes, this requires us to flush out the entire network.
  3. We reconfigure your piping as needed so it perfectly fits the new boiler.
  4. We connect your boiler to the water line, water outlets, your radiators, and, if necessary, the water tank.
  5. If you’ve optioned for extra accessories, like water filters or filling loops, we connect those as needed.
  6. Once we’re sure we’ve connected everything correctly, we test your system to confirm it functions efficiently and safely.
  7. Finally, we spend time showing you how to work your boiler and answering any questions or concerns you might have.

If the installation is simple, such as replacing your current boiler with one of the same type, installation can take as little as four hours. If complications arise or you need significant changes to your HVAC system, the process can take up to five days. No matter the effort and duration required, Quality Heating, Cooling & Plumbing practices frequent and clear communication.

Contact Quality Heating, Cooling & Plumbing for All Your Heating Needs

How long does it take to install a new boiler? It depends on a number of factors, but Quality Heating, Cooling & Plumbing works as efficiently as possible to help you regain efficient heating for your home. We’re Tulsa’s first choice for HVAC because we’ve maintained a 20-year history of unparalleled service.

Whether you’re looking for a newer boiler heating system or want other HVAC solutions, Quality Heating, Cooling & Plumbing can help. Book an appointment by calling 918-393-4204.

Why Your House Is Colder Than the Thermostat Setting

Are you struggling with maintaining comfortable temperatures within your home? Call Quality Heating, Cooling & Plumbing today at (918) 262-5245 for a permanent fix!

Winter in Oklahoma is very uncomfortable. Temperatures can drop below freezing on some nights. It’s certainly not the time for uncertainties with your HVAC system. So, it can be frustrating when your house is colder than the thermostat setting, and you can’t figure out what you’re doing wrong or where the problem lies.

As a professional AC installation company in Tulsa, OK, we get calls from many homeowners in this situation. In our experience, the problem usually lies with the thermostat, the HVAC system, or the state of the property. We’ll cover the details in this post.

professional AC installation company in Tulsa, OK

Problems With the Thermostat

Problems that affect the thermostat’s operation may bring a disparity in the numbers you see on the screen and what the temperatures feel like to anyone inside the house. Common problems include the following:

Dirty Thermostat

A dirty thermostat invariably means a dirty sensor. When the sensor is dirty, it will communicate a warmer reading to the thermostat, creating that imbalance between the numbers on the thermostat and the conditions inside your house.

Cleaning the thermostat resolves the problem. Be sure to follow the manufacturer’s recommendations to prevent damage to the unit.

A Thermostat in the Wrong Location

If your house is colder than the thermostat setting, it’s a good idea to re-evaluate the thermostat’s positioning. If you’ve exposed the unit to direct sunlight or any appliances that generate heat, there’s a high probability you’ll get inaccurate readings.

The best position for your thermostat is around the center of your home and away from windows and doors.

Insufficient Power to the Thermostat

Weak or dead batteries can affect your thermostat’s performance. It’s easier to spot battery-related problems. Check for battery notifications, short cycling, and any other strange behaviors.

Replacing the batteries will solve the problem in most cases. Be sure to clean out corrosion and dirt from the contact points. If the batteries are still new and there’s no corrosion, the problem lies elsewhere. 

Damaged Wiring

If you’ve had the thermostat for a while, it’s a good idea to check the wiring for signs of damage. If the wiring is faulty, the thermostat will generate inaccurate readings, leaving your house feeling colder than it should be.

Remember that you should never attempt to fix faulty wiring on your own. It’s best to contact a professional to avoid potential accidents.

Unbalanced Thermostat

Do you have an older thermostat? You need to check to confirm that it’s level. Such thermostats have sensitive components, like a mercury switch. Therefore, if the unit isn’t level, you’ll notice a difference between the room temperature and the readings from the thermostat.

To balance the thermostat, open the cover to check and fix the subbase with a level. Once the subbase is level, screw back the thermostat cover.

We recommend switching to a smart programmable thermostat if you have older units that require balancing. However, until you complete the switch, fixing the balance should make your home feel as warm as you expect.

Problems With the HVAC System

If your house is colder than the thermostat setting and you’ve ruled out thermostat-related issues, it’s time to turn your attention to the components of your HVAC system, especially the furnace and heat pump.

Dirty Filters

The filters in HVAC systems are there to keep airborne contaminants from entering your home.

Ignoring filters for too long can lead to a buildup of dirt and debris, preventing warm air from reaching parts of your home. As a result, your house will feel colder, even when your HVAC system is working as it should.

Cleaning or replacing the filter in this scenario should restore your home’s temperatures to the desired levels, as more warm air can pass through the filters. Regular HVAC maintenance can prevent a recurrence.

Broken Components

If your filters are not dirty, you may have a broken or malfunctioning HVAC system. Dirty or worn flame sensors, blower motor problems, clogs in the condensate lines, and electrical issues are some of the many problems that can leave your HVAC system failing to deliver the temperatures you’ve programmed in your thermostat.

Undersized HVAC System

Using the wrong heating equipment size can cause various issues, including insufficient heating and inaccurate thermostat readings. When your furnace or heat pump system is too small for your home, it will take ages to deliver enough heat to match the thermostat’s reading—if it ever does.

Thus, you’ll rack up higher energy bills even while in discomfort. The furnace or heat pump will also wear out faster. If you suspect you have an undersized furnace, you should call in a qualified technician for confirmation and to find the right size unit for your home.

The technician may also recommend creating different temperature zones around your property instead of changing the entire HVAC system. Sometimes, combining a mini-split system with a central heating system is the more cost-effective option.

Problems With the Property Structure

Sometimes, it’s not the HVAC system or the thermostat. It might just be your house. You’ll likely notice that your house is colder than the thermostat setting if the following situations apply:

Poor Insulation

Your house will feel colder than the thermostat’s readings if the conditioned air is escaping outside. Unfortunately, ignoring your home’s insulation is easy until it becomes a major issue. Drafty windows or doors are easier to notice, but how about your attic or crawlspace?

For example, the R-value (thermal rating) for attics in Oklahoma is R30-R49. It’s difficult to reach those numbers if you have decayed fiberglass batts in your attic.

Heat rises. Therefore, poor insulation in the attic means that any hot air from your HVAC system will escape upward within a few minutes of entering the living areas. As a result, you’ll notice a disparity in the thermostat’s readings and the temperature within your house.

Poor insulation is also bad news in terms of heating system efficiency. The HVAC system will work harder than normal, wearing out components faster and increasing energy bills.

A quick test to confirm your home’s insulation quality is to touch the walls, ceiling, and floor in winter. If they feel dry and warm, your home has decent insulation. Otherwise, you should call in a professional to discuss improvements.

Leaky Ductwork

The warm air from your HVAC system will travel through the air ducts to the rest of your home. If there are any air leaks in the system, you’ll lose the bulk of the heat before it can enter your home.

You’ll need professional help to spot gaps or leaks within your ductwork.

Get Definitive Answers From Quality Heating, Cooling & Plumbing 

As you’ve seen in this article, it’s hard to know what the problem might be if your house is colder than the thermostat setting. Once you’ve done the basic troubleshooting, like checking the thermostat batteries or thermostat calibration, you’re better off calling a professional HVAC technician to determine the root of the problem without any guesswork.

That’s where we excel here at Quality Heating, Cooling & Plumbing. Whether you have a faulty thermostat or a broken furnace combustion mechanism, you can trust us to find the problem and implement a lasting solution in the shortest time possible.

Ready to book an appointment? Call Quality Heating, Cooling & Plumbing today at (918) 262-5245 for answers to your questions, service, and more.

Why Is My AC Bill So High?

Are you sick of high energy costs and how much you’re paying just to keep your home cool? If you’re searching, “Why is my AC bill so high?” keep reading to discover the answers.

As Tulsa’s AC repair experts, Quality Heating, Cooling & Plumbing works hard to keep your HVAC system working and your energy bills lower.

1. Dirty Air Filter

As an air filter accumulates dust or dirt, it reduces your air conditioner’s airflow, forcing it to work harder to produce the same results. This uses significantly more energy than when your device puts in minimal effort to keep your home at a comfortable temperature.

While some air conditioners can use premium air filters that last up to 90 days, you should check most filters every 30 days. If the filter has a thick layer of dust, replace or clean it (depending on the type). If you own pets, have a smoker in the house, experience allergies or respiratory issues, or live in an area with heavy pollution, you’ll likely need to change your filter more frequently.

2. Leaking Air Ducts

Your ductwork is responsible for transporting your treated air throughout your home. In a healthy system, the ductwork is completely sealed and doesn’t lose much air as it travels from the air conditioner into your room.

However, over time, the ductwork can spring leaks or develop tears. When your ductwork leaks air, your home doesn’t cool as effectively, and your air conditioner must run harder and longer before it reaches your desired temperature.

3. Broken Components

Depending on the broken components, your air conditioner could still function while needing repairs. However, though it can function when its blower, compressor, or capacitor aren’t fully functional, its cooling ability suffers. As always, when the air conditioner works harder and longer, it increases your energy bills.

Fixing your air conditioner should restore it to full efficiency and lower your utility bills.

4. Wrong Size Air Conditioner

You need the right size air conditioner to efficiently and effectively cool your home, and if it’s too large or small, your energy bills suffer.

If your device is too small, it can’t adequately keep up with the demand, and you’ll end up running it constantly.

If your air conditioner is too large, it cools your home too quickly and rapidly turns on and off. This quickly ages your unit and uses a significant amount of energy.

When you upgrade to a high-efficiency air conditioner that’s the correct size for your home, you’ll see your energy bills drastically decrease. Your HVAC specialist can help you determine which air conditioner is best for your home or business.

5. Low Refrigerant

If you’re wondering, “Why is my AC bill so high?” it could be your air conditioner’s refrigerant levels. The refrigerant is responsible for transporting heat out of your home and leaving you with cool air. Though a sealed system houses the refrigerant, as it ages, it can develop leaks.

If you notice your air conditioner expelling lukewarm air, the refrigerant is the likely problem. Running your device longer won’t help. Instead, call an HVAC technician to repair the leak and restore the refrigerant levels to normal.

6. Ignored Maintenance

The most important thing you can do for your air conditioner is to schedule regular maintenance. However, many homeowners ignore it because they believe it’s an unnecessary expense. Without maintenance, your air conditioner will break and run less efficiently, costing you more money over time than you’d save on regular maintenance.

Schedule maintenance once a year, preferably in the spring, to adequately prepare your air conditioner for heavy summer usage. Some homeowners prefer to schedule a second maintenance check in the fall to determine how much wear and tear the device suffered over the hot months.

7. Age

With regular maintenance and moderated usage, your air conditioner should last between 15 and 20 years. However, no matter how well you care for it, as the device ages, it will run less efficiently.

Is your air conditioner running well, but you still notice higher energy bills? You might find it more cost-effective to replace it with a newer model.

8. Improper Installation

Even the most experienced HVAC technician can make mistakes while installing your air conditioner. Whether it has a missing part, bad connection, or isn’t properly sealed, all these issues can severely affect your energy bills.

A more experienced technician can fix the problem and return your energy bills to an acceptable level.

9. Constant Usage

You might think running your air conditioner constantly is best to help maintain the comfort in your home. However, constantly running your air conditioner uses a lot of energy and reduces your device’s life expectancy. To moderate how often you use your air conditioner without sacrificing comfort, follow these tips:

  • Set your thermostat to 78 degrees.
  • Use ceiling fans to help the air feel cooler.
  • Use UV-blocking window treatments to reduce the heat your home gains by up to 45%.
  • Most importantly, don’t use your air conditioner when you’re not home to enjoy the cool air.
  • If you want to come home to cool air, consider installing a programmable or smart thermostat to turn on roughly 20 minutes before you return home.

10. Poor Insulation

Insulation determines how much air leaks through your home, and a lack of insulation in your attic, windows, and doors can force your air conditioner to work much harder. An HVAC technician can perform tests to determine where you lack insulation and then take steps to improve it.

Contact Quality Heating, Cooling & Plumbing To Save Money on Your Energy Bills

If you’re wondering, “Why is my AC bill so high?” consider any of the above reasons. Whether you experience weak air conditioner airflow or don’t know how to replace your filter, Quality Heating, Cooling & Plumbing can help with every problem. We’re quality to the core, and we work hard to ensure you’re always satisfied.

To see what we can do for you or to schedule an appointment, call us at 918-262-5245.

How To Balance an HVAC System: A Brief Guide

Ensure your HVAC’s energy efficiency with air balancing from Quality Heating, Cooling & Plumbing. Request your appointment today!

One of the most frustrating aspects of relying on an HVAC system to keep indoor temperatures comfortable is discovering hot and cold spots inside your home. These uneven temperatures could be due to an unbalanced heating and cooling unit, so learning how to balance an HVAC system is integral to your comfort and energy consumption.

Ideally, an HVAC system will undergo air balancing during its installation. Yet, loose damper settings or a change in heating and cooling needs could result in an imbalance, leaving one or more rooms feeling less comfortable than others. 

Learn more about HVAC air balancing with these tips from a trusted heating and cooling company in Tulsa, OK, below.

Understand the Importance of Balancing an HVAC System

If you have an unbalanced HVAC system, you won’t experience consistent temperatures throughout your home. Air balancing HVAC systems that use ducts to transport air also have thermometer sensors that ensure each room gets the right amount of heated or chilled air to maintain a consistent temperature. 

Though comfort is a top benefit of balancing an HVAC unit, the process also improves indoor air quality. As air circulates through the system, its filter catches airborne contaminants like pollen, dust, and pet dander. Air becomes cleaner faster when the HVAC system circulates air at its proper rate. 

You should also balance your HVAC system to improve its functionality and longevity. When these systems operate at peak performance, they aren’t likely to develop premature wear and tear from an undue strain on their components. They won’t have to work harder to produce and maintain temperatures, so you’ll spend less time and money on HVAC repairs. 

Have the Right Documentation

The first step in learning to balance an HVAC system is having the right documentation to tell you how the system should perform. HVAC technicians refer to various pieces of information to help them make essential adjustments like:

  • Air duct layouts
  • Duct design calculations
  • Control documentation
  • Equipment specs

Not all homeowners have this information, especially if they weren’t responsible for their existing HVAC system’s installation. If you don’t have documentation, create a sketch of the air duct system with a tracking chart showing the airflow of every inlet and outlet. 

Make Sure Your System Is Running Under Its Design Conditions

When your HVAC unit runs, it should operate within its design parameters or be as close to them as possible. To determine whether your unit meets its design conditions, open all volume and splinter dampers and check the fan speed. Then, ensure the air pressure is within its design parameters with a static pressure reading. 

You also want to ensure the HVAC unit’s accessories, like its air filter, are in place. With the air filter, ensure it’s clean to maximize airflow. 

Record Airflows on All Supply Outlets

When measuring the system’s airflow, a vane anemometer makes the task a snap. Use the tool on every inlet and outlet and document them. If you have a sketch of your air duct system, you can record the readings there to compare them to previous readings, if applicable. 

Adjust Dampers

Depending on the airflow readings, you may need to adjust the balancing dampers on certain outlets. Each damper has a wingnut you can use to open the dampers in branch ducts. 

Keep recording airflow and adjusting dampers until the outlets with the most airflow are within 10% of the HVAC system’s design. 

Get Professional Help With Air Balancing Your HVAC Unit

Despite knowing how to balance an HVAC system, it’s a job you should leave to the professionals. Experienced HVAC contractors have the expertise to adjust the system to ensure optimal performance throughout the property. They also have access to professional tools like hygrometers for checking humidity and manometers for taking static pressure readings. 

Professional air balancing is also ideal over DIY attempts because technicians can quickly identify other reasons your system might not perform optimally. For example, they can install new dampers if the existing ones are faulty or damaged. 

Follow Best Practices for HVAC Air Balancing

You can improve your HVAC system’s performance by not putting furniture near vents. Anything that impedes airflow through the HVAC unit will cause uneven heating and cooling throughout the house and excessive energy consumption. Furniture, bookcases, and other structures should be at least 18 inches from floor vents and wall registers. 

It’s also helpful to keep electronic equipment away from your thermostat. Electronics produce heat, which can trick the thermostat into triggering the heating and cooling system, forcing it to turn on or shut off prematurely. Televisions and computer monitors are the biggest culprits of this problem that people often overlook.

Finally, you should maintain your HVAC system properly to keep everything running smoothly. All components must work together to maximize the system’s output without consuming excessive energy. 

Proper maintenance includes changing your air filter at least once per season, or monthly if you have pets or allergies. Dirty air filters restrict airflow, causing debris to accumulate inside your heating and cooling equipment and dropping the indoor air quality. 

Professional HVAC maintenance is also essential because technicians will inspect your home’s air ducts for leaks and damage. Air duct leaks are a common element in uneven heating and cooling inside a building, so routine duct inspections are a must to ensure that heated and chilled air reaches all rooms accordingly. 

how to balance an hvac system

Get the Best HVAC Care From Tulsa’s Top HVAC Company

Now that you know how to balance an HVAC system, let Quality Heating, Cooling & Plumbing’s professional technicians give your equipment the care it deserves. As Tulsa, OK’s top heating and cooling company, our local, well-trained crew has years of experience providing reliable HVAC services. Whether you need to repair your AC or install a surge protector for your HVAC, we’re the company to call.

Request your appointment with Quality Heating, Cooling & Plumbing at (918) 262-5245